Corner paint rollers are designed to help you paint those difficult to reach areas, like the corners of your walls. But do they really work? Some people say that corner paint rollers are a waste of money and don’t work very well. Others find them helpful for painting tight spaces. If you’re considering buying a corner paint roller, it’s worth doing some research to see what others think before making your decision.
No, you only need to cut in once when painting.
If you're considering using a paint edger to save time and effort on your next painting project, you may be wondering if they really work. The short answer is yes, paint edgers can save you time and produce professional-looking results. Paint edgers work by masking off the area you want to paint and providing a guide for you to follow as you paint. This can help you paint a straighter line and avoid painting over areas you don't want to paint. Paint edgers are especially helpful for painting baseboards, moldings, and other areas where a
When painting a room, do you cut in before or after rolling? The general consensus is that you should cut in before rolling. This allows you to get a clean, straight line along the edges of the walls and ceiling, and prevents paint from getting on the roller and making a mess.


4.8/5
Easier to use than a Brush
Reach into tight spaces with ease
Eliminates taping to save time and money
Fits behind obstacles and paints in spaces as small at 5/8 inch
Ideal for painting behind toilets, appliances, radiators, wall mounted tvs and other obstacles

$234
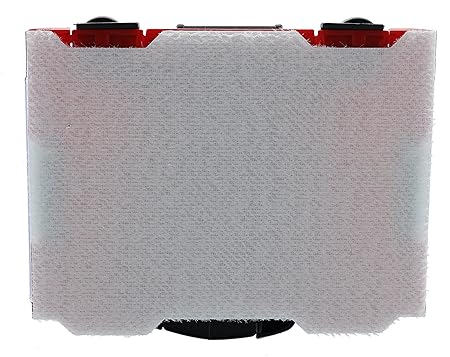
The handle and this pad are parallel. Since it isn't angled, I don't have as much control as I'd want even though there is some give when it goes down the wall. When I moved along the wall next to a door frame, the pad occasionally came off. I can still use it, but I like the ones with handles that pivot.
3.8/5
1-touch ejectable pad
Retractable guides
Paint Edger "Pro" model
180 degree swivel handle
Woven pad assures straight and smooth lines
Enables clean trimming around windows, doors, moldings, and cabinets
Handle Attaches To Threaded Extension Poles
$234


I wish I had have purchased this sooner. I read the reviews and have started applying paint to it with a brush as advised. Despite the fact that it takes much longer than dipping it in a tray, the mess is reduced. I'm going to try dipping it in a paint tray the next time I use it, and I'll keep some rags around to clean the wheels. I should also add that purchasing high-quality paint brushes is another lesson I've learnt about painting in general. I've painted a lot in the past with mediocre brushes, but this time I invested in an excellent one. What a difference, boy. I purchased the Wooster shortcut, which costs six dollars on Amazon, and the Purdy pro extra, which costs thirteen dollars on Amazon. Although the Purdy contains more paint and requires less frequent loading, the Shortcut is also a great nice brush for the money. Pick up a nice roller cover, a good brush, and the Shur line for your next painting endeavor to save time over purchasing the less expensive options. As long as you thoroughly wash them, they will last for a very long time and wind up being less expensive than purchasing a few of the disposable ones.


3.7/5
EFFECTIVE ON UNEVEN SURFACES: The included painting pads on these accessories are made out of a rugged material that lets them cling to uneven surfaces, providing a more even coverage than the average paint brush
EASY PAD REPLACEMENT: The paint edger has a button to eject wet pads, so you don’t have to get your hands messy when the job is done
PAINT EDGER PRO: At 4.75 x 3.75 inches, this compact painter’s accessory will help you create crisp lines on baseboard and ceiling edges with equal ease. Screw a paint pole into the included slot to give you extra reach so you can complete a variety of jobs around the house
FLEXIBLE HANDLE: This accessory will conform to your unique painting style, flexing along as you twist your wrist to reach the tightest spaces possible
VERSATILITY: The fabric pads included in this kit can handle a variety of different paint styles, including gloss, semi-gloss, satin, eggshell, and flat
$234
This item is AMAZING! I should have just bought it instead of wasting time reading reviews, which I did. Because of all the edging, I was dreading painting my daughters' bedroom, but this tool made it simple to complete two coats in just over 2 1/2 hours. I regret not purchasing it years ago. To get acquainted to how it operated, I first moved rather slowly without attaching it to any handles. I found out where to apply the paint on the pad to get the best coverage with no drips, and all I had to do was make sure the wheels stayed dry. Even my baseboard trim and baseboard heaters received the treatment. We should have bought one before painting the entire house; I can't believe we didn't.
3.6/5
HOMERIGHT QUICK PAINTER: HomeRight’s revolutionary pads have tightly woven bristles that pick up paint with less dripping. They work paint into your surface to provide superior penetration and stunning results
EZ-TWIST PAINT STICK: Use the QuickPainter with the PaintStick or PaintStick EZ-Twist to have your room painted in a fraction of the time.
HIGH QUALITY: The high-quality, flocked neoprene pad has an adhesive backing, which peels off to stick to your QuickPainter
PERFECT PAINTING: The perforated, flow-through design is perfect for cutting in around trim and doorways for precise or tight painting
$234


I'm quite happy I have the Quick Painter tool. Both loading paint and cleaning up afterward are simple (assuming water-cleanup latex paint is used). I had trouble finding replacement pads in stores, so this transaction was quick and inexpensive. The business where I originally purchased the Quick Painter had the pads online at a tiny discount, but I would have had to have them delivered to the store and then travel a half-hour to pick them up. With the purchase, I'm pleased.


3.4/5
Pivoting handle provides speed and control
Perfect for inside corners
Woven fabric replaceable pad
Handle is threaded for extension poles
Plastic comfort grip handle with woven pad applicator
Easy one-step painting for inside corners
$234
Favorite Corner Painter Just take care of the corners, then use a large roller to finish the bigger area. It saves time, and these days, time is money. The tool that will pay for itself is this one. and the extension pole adaptor is useful for jobs that are high or difficult to access. When you brush downward while using an extension pole, the unit tilts, resulting in good surface contact and smoother paint application. Awesome
3.1/5
Trims ceilings, baseboards, windows, doors and molding
Horizontal and vertical guide wheels ensure sharp clean lines and keeps paint off baseboards
Use with an extension pole or by hand
$234

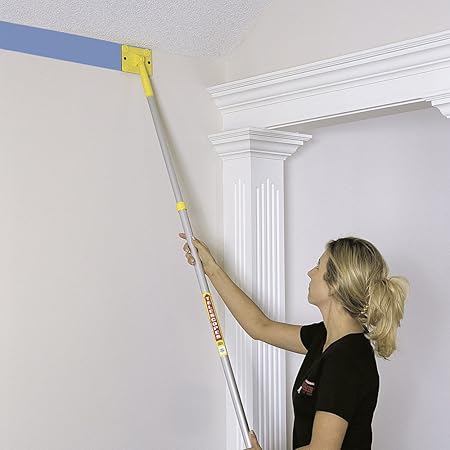


When expanding above six feet, I wouldn't think you could utilize this without a ladder. I have a stairwell with two stories and a cottage cheese-style ceiling. I was performing sidewalls. Verify that the roller guides are on top. Fill the paint container to the top and stir the paint in by moving back and forth a little.Once the paint is evenly distributed, I tap the wall three to four times. I then pull sideways, from left to right, approximately 12" at a time, and use a downward finishing stroke to feather out the paint so there won't be a paint ridge when you go to roll out the remaining portion of the wall. Cleans up nicely.


3/5
HOMERIGHT PAD ADVANTAGES: HomeRight’s revolutionary pads have tightly woven bristles that pick up stain with less dripping. They work stain into your surface to provide superior penetration
CONNECTS TO THE QUICKPAINTER: Connect the Corner Pad to the QuickPainter C800771 (not included) to have your room painted in a fraction of the time. The QuickPainter holds paint in the handle, which creates less drips and messes
PERFECT FOR SHARP CORNERS: The pad is shaped to easily paint 90 degree angles
EASY TO USE: The QuickPainter Corner Pad has perforated holes to provide a steady stream of paint to your surface. Simply press the QuickPainter trigger to feed paint to the pad
PAINT THE CORNERS OF A ROOM: This home improvement painting tool allows the user to easily paint the corners of a room without having to worry about cutting in with a brush
$234
Because the holes in this corner attachment are better aligned with the shape it's designed to paint, it really performs much better than the edger pad. Despite having far less usage, it is still worth the little more than $7 I purchased for it. Get the Quick Painter from Black
2.8/5
EASY TO FILL: Press the trigger and draw back on the yellow handle to draw material directly into the handle from the paint can
HOLD PAINT IN THE HANDLE: The durable handle holds up to 4.5 ounces of material, allowing you to paint up to 50 ft. of wall space per fill
CONTROL YOUR PAINT FLOW: Slowly press the trigger to feed paint directly to the paint pad. The 3†pad is made of high-quality, flocked neoprene material
PRECISE APPLICATION: The built-in edging guide and convex design of the applicator pad enable precision application of paint along an edge
PAINT EDGING TOOL: Quickly and cleanly paints edges around baseboards, window trim, doors and ceilings
$234


I recently purchased this item and eagerly tore it from the packaging. Having read a number of reviews, I was interested to learn about some of the issues raised in the negative comments.Test it out with water to get the idea without the head attached, and you'll see how the amount of liquid released depends on the pressure you apply to the button. Small pressures with quick releases will drizzle out a little liquid, while large, prolonged presses will blast it out like a super soaker.Complete reviewHere are my results after immediately deciding to test the product with water after opening the packaging:First test: Pressed button, pulled back trigger, released handle while holding trigger, and it immediately emptied the tube into the sink at super soaker strength, similar to a small water gun you keep in your boat when traveling down the river to get your buddies.Second test: It kept the water fairly well after being refilled. Let go of the trigger button, then let go of the handle. then used much less pressure to press the button halfway down and hold it there, but the water flowed out swiftly and wasted it all in just a few seconds.Third test: Fill it up again and release the button and handle; it held the water this time without leaking; next, I lightly tapped the button with my thumb and only a tiny bit of water came out; this is how I imagined using it while painting; I practiced the pressure a few times to get used to it; it took a few minutes of tiny squirts before all the water was gone.Fourth test: I filled it, released the button, and let go of the handle. This time there were no leaks, but I used light pressure on the button to watch the water slowly drain out, which took about 45 seconds. This is not ideal if you want to maintain constant pressure on the button and streak across your wall because you'd need to work extremely quickly to avoid drips.I was concerned because of the unfavorable reviews, but this product looks wonderful for the purposes it serves. I suggest practicing with water before using it to get the hang of it, but I can see how jamming the button all the way down even in small quick bursts could cause some major paint problems on your wall. However, with a little bit of practice, you'll quickly understand how it works and be able to quickly solve your edging issues!I appreciate everyone who took the time to read this, and I hope it was beneficial.
If you are using the same color paint for the second coat, then you don't need to cut in again. You can just roll the paint on.
It's a common question when painting a room: do you paint the walls or the trim first? The answer is that it depends on the circumstances. If you're painting a room with high walls and lots of trim, it may be best to paint the trim first so you don't have to worry about getting paint on the walls. On the other hand, if you're painting a room with low walls and not much trim, you can probably get away with painting the walls first.
The Accubrush paint edger is a handheld paintbrush that is designed to make it easier to paint straight lines. It has a built-in paint reservoir and a roller that spins to help distribute paint evenly. I have not personally tried the Accubrush, but from what I have seen in reviews, it does seem to work well. Many people say that it makes painting much easier and quicker, and that the results are very professional looking. If you are considering purchasing an Accubrush, I would say go for it! It seems like a great product that
If you're painting a room and need to cut in around the edges, don't worry – it's not as difficult as it looks. Here's how to do it like a pro: 1. Pour some paint into a paint tray, then dip your brush into the paint. Make sure to load the brush up well, but not so much that the paint is dripping off. 2. Start at the top of the wall and paint a strip about 2-3 inches wide. 3. Use a light, even pressure as you paint. 4.
If you want a perfect line between your wall and ceiling, the best way to achieve this is by using a level. First, find the highest point on your wall and mark it with a pencil. Then, using the level, draw a line across the wall at that point. Next, find the lowest point on the wall and mark it with a pencil. Finally, using the level again, draw a line across the wall at that point.
To get crisp lines when painting, you need to use a good quality paintbrush and make sure that your paint is not too watery. Start by painting a small area and then going over it with a second coat to make the lines more visible.
COPYRIGHT © 2019


