You can soak fabric in Rit dye overnight, but it is not recommended. The Rit website says that soaking for more than 30 minutes can cause the dye to bleed, so it is best to stick to the recommended time frame.
Clothes should be washed after dying them to remove any excess dye and to set the color. Excess dye can transfer to other clothing in the wash, which can cause staining. Washing also helps to evenly distribute the color and prevent fading.
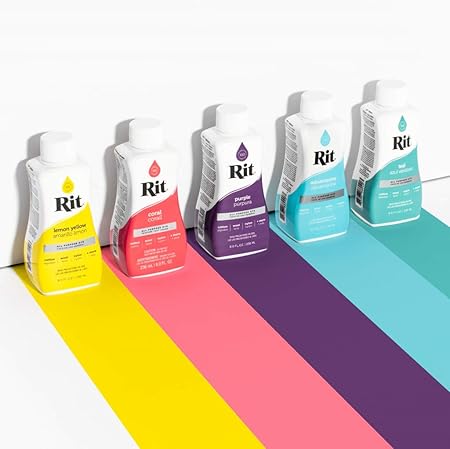
Rit dye is a very popular brand of fabric dye, however, it is not without its problems. One of the biggest complaints about Rit dye is that it bleeds. This can be a huge problem when trying to dye fabric, as it can ruin the fabric and cause it to bleed onto other materials. There are a few things that you can do to try and prevent this from happening, but unfortunately, there is no guarantee that your fabric will not bleed. If you are planning on using Rit dye, it is important to be aware of the potential problems that can occur.
There are several ways to set dye in fabric. The most common method is to use heat. This can be done by either ironing the fabric or using a hair dryer. Another method is to use a fixative. This is a chemical that helps the dye to bond to the fabric.


4.5/5
Use with 100% natural fiber fabrics like cotton, rayon and wool for best results
Perfect for large summer camps, parties, school events, family reunions and other group activities
Kit includes a reusable plastic storage bin stocked with enough tie-dye supplies to create up to 36 projects
Features 18 easy-squeeze bottles of highly-concentrated nontoxic One-Step dyes in 14 popular colors – just add water to activate
Includes step-by-step technique guide featuring over 8 tie-dye looks to choose from
Download FREE tie-dye party printables at tiedyeyoursummer.com
No need to presoak fabrics in soda ash before dyeing
Dyes are safe to machine wash – colors stay bright and bold through repeated washings

$234
We have bought this same package twice, and each time we have had a great time. How the kit was applied: The brand-new, 100 percent cotton shirts were washed and left damp while being folded and rubber-banded. After combining the dye, we applied it. We put each shirt in its own gallon-sized Ziploc bag, left it outside in the sun until dusk, and then brought it inside, still in the baggies, to the laundry room. The following morning, we cleaned each banded shirt until the water was clear before soaking them in a sizable bucket filled with cold water and several glasses of white vinegar. The shirts came out beautifully when I washed them in the washing machine on delicate with color-safe detergent 30 minutes after the vinegar soak. No further processes or soda ash were added. I heartily endorse this item! I've included a photo collage of our shirts and tanks, which were created on two distinct occasions with two different kits. :)
4.3/5
Use with 100% natural fiber fabrics like cotton, rayon and wool for best results
Perfect for large summer camps, parties, school events, family reunions and other group activities
Kit includes a reusable plastic storage bin stocked with enough tie-dye supplies to create up to 36 projects
Features 18 easy-squeeze bottles of highly-concentrated nontoxic One-Step dyes in 14 popular colors – just add water to activate
Includes step-by-step technique guide featuring over 8 tie-dye looks to choose from
Download FREE tie-dye party printables at tiedyeyoursummer.com
No need to presoak fabrics in soda ash before dyeing
Dyes are safe to machine wash – colors stay bright and bold through repeated washings
$234


**UPDATE**In my original assessment, I said that neither a Deglazer nor a sealant were necessary. It never rubbed off on anything since I was using the purse in the winter. This week, I took it outside for the first time in the rain after storing it in the closet. I'm also wearing it for the first time over my bare shoulders. The colour gets on my skin when I perspire. Furthermore, I can still see the red behind the leather anytime it splits. Additionally, I keep spotting little red areas I overlooked. Although purchasing all three products is not strictly necessary, doing so will unquestionably result in the best, most polished results. Now that it's getting damp, I'm going to buy the sealant to stop the colour from rubbing off.*****I recently discovered a red Kate Spade purse at a resale shop that was structurally sound but had red leather that was severely faded and stained. I made the decision that dyeing it black would save it. The Fiebings Leather Dye package advises purchasing their Deglazer solution to remove any existing dye or pigment before dying leather. After reading that, I put off buying the Deglazer product for about two months while I waited to have the extra money.Finally, I made the decision to simply try it out and see how nicely the black stained the red leather. I made the decision that, in the worst-case scenario, it would look awful and I could use the deglazer solution to remove it once more. I started the dyeing process after using leather wipes (found in most automotive departments), and it worked out great!Remember that there is a very good chance that this material will drip...everywhere. I have black hands. Even after using a Magic Eraser, my desk is still black. When you are dying, take care. Remember that dye has a high absorption rate.I had to cover the purse areas with tape that I didn't want to be stained. Thankfully, using brass cleaner worked to remove it when it got on the Kate Spade metal plaque. In order to get into the tiny crevices that the applicator could not, I also used a very tiny and fine paintbrush.I've included a few images with my evaluation. One shows the finished item, and the second shows the interior zipper so you can see the original red color of the bag.I've never dyed leather before, but I'll keep doing it for the rest of my life. There are so many instances where the color has faded on once-expensive leather couches and chairs that I have seen at yard sales and thrift shops. Looking back, all it required was a fresh coat of leather dye to restore it to new condition.There is still plenty of the bottle for me to keep around in case I need to dye something else, as this one handbag probably used around one-third of it. In the event that I ever need any additional colors, I will buy Fiebings brand again. I heartily endorse it.


3.9/5
Deliver vibrant color to almost any type of fabric or fabric blend, including cotton, linen, silk, wool, rayon, ramie or nylon. This dye can even color wood, wicker, paper and cork
With 1,000+ color recipes available on Rit’s website, it is almost certain you’ll find the right color for your needs
Get creative and create something unique with an easy dye technique, like an ombré, dip dyed, marbled, shibori or tie-dye pattern
If dyeing fabric with 35% or more polyester, acrylic or acetate, use Rit DyeMore Synthetic Fiber Dye instead
Perfect for rejuvenating faded clothing, changing the color of apparel, shoes or accessories, coordinating home décor, hiding laundry accidents and so much more
$234
To begin with, the directions provided on the Rit website are NOT the same as those found on the bottle. On the website, it is advised to use twice as much dye when using rich hues like navy blue, as well as to add salt and laundry detergent.I used 25 gallons of the hottest tap water I could find and five bottles of color. Because I only had Morton's Kosher Salt in my possession, I added half a box. Five minutes after submerging the blankets in the dye water, I added the salt. I forgot about the detergent until it was too late, so I did not add it.Two king-size cotton knit blankets that I coloured. One was very faded and used to be navy. When I made the decision to dye one, it was white in its heyday but looked quite shabby.Three hours were spent with the blankets in the dye bath. According to the website, as long as the water stays hot, you can leave the material in the dye for up to an hour.The tub's water was still incredibly hot three hours later. Most likely as a result of the tub's superior heat retention compared to a Rubbermaid tub.I DO NOT advise use your bathtub. Perhaps fill the tub to the top with a rubbermaid tub or bucket, and then fill the tub around it with hot water. My tub is 60 years old, pink, and I didn't care whether it still had some of its original colour because it would be replaced in about a year. With Scrubbing Bubbles shower foam and a scrubby pad, the most of it came out, but I wouldn't recommend using your tub unless you don't care if it retains the color.The blankets were wrung out and put in the washing machine on COLD, one at a time. It turned absolutely fantastic. The color is lovely and vivid. I've included pictures that demonstrate how dark the blankets turned out, although the color appears to be mostly gray in the pictures. These throws really are blue. The left blanket in the picture was the faded navy one, and the right one was once white. On one photo, I utilized the flash; on the other, I did not. This should give you a better notion of what to anticipate if you use more colour and time than the container specifies.Before attempting to dye something a dark color, I would definitely use a lot of dye and consult the Rit website.
3.9/5
Perfect for rejuvenating faded clothing, changing the color of apparel, shoes or accessories, coordinating home décor, hiding laundry accidents and so much more
If dyeing fabric with 35% or more polyester, acrylic or acetate, use Rit DyeMore Synthetic Fiber Dye instead
Get creative and create something unique with an easy dye technique, like an ombré, dip dyed, marbled, shibori or tie-dye pattern
With 1,000+ color recipes available on Rit’s website, it is almost certain you’ll find the right color for your needs
Deliver vibrant color to almost any type of fabric or fabric blend, including cotton, linen, silk, wool, rayon, ramie or nylon. This dye can even color wood, wicker, paper and cork
$234


To begin with, the directions provided on the Rit website are NOT the same as those found on the bottle. On the website, it is advised to use twice as much dye when using rich hues like navy blue, as well as to add salt and laundry detergent.I used 25 gallons of the hottest tap water I could find and five bottles of color. Because I only had Morton's Kosher Salt in my possession, I added half a box. Five minutes after submerging the blankets in the dye water, I added the salt. I forgot about the detergent until it was too late, so I did not add it.Two king-size cotton knit blankets that I coloured. One was very faded and used to be navy. When I made the decision to dye one, it was white in its heyday but looked quite shabby.Three hours were spent with the blankets in the dye bath. According to the website, as long as the water stays hot, you can leave the material in the dye for up to an hour.The tub's water was still incredibly hot three hours later. Most likely as a result of the tub's superior heat retention compared to a Rubbermaid tub.I DO NOT advise use your bathtub. Perhaps fill the tub to the top with a rubbermaid tub or bucket, and then fill the tub around it with hot water. My tub is 60 years old, pink, and I didn't care whether it still had some of its original colour because it would be replaced in about a year. With Scrubbing Bubbles shower foam and a scrubby pad, the most of it came out, but I wouldn't recommend using your tub unless you don't care if it retains the color.The blankets were wrung out and put in the washing machine on COLD, one at a time. It turned absolutely fantastic. The color is lovely and vivid. I've included pictures that demonstrate how dark the blankets turned out, although the color appears to be mostly gray in the pictures. These throws really are blue. The left blanket in the picture was the faded navy one, and the right one was once white. On one photo, I utilized the flash; on the other, I did not. This should give you a better notion of what to anticipate if you use more colour and time than the container specifies.Before attempting to dye something a dark color, I would definitely use a lot of dye and consult the Rit website.


3.8/5
Use immediately after a tie-dye or dip-dye project to prevent dye from bleeding into white areas
Made in the USA
Perfect for dye projects and commercially dyed fabrics
Locks in color to reduce bleeding, fading and even enhance the color of your fabric
Works best on cotton, linen, rayon, ramie or fabric blends that contain these fibers
$234
I frequently wear black because I'm a hairdresser. A few times a year, I dye all of my black clothing because it tends to fade easily and I wash my clothes frequently because dealing with chemicals and hair clippings becomes filthy. I use a special detergent made for dark clothing in cold water, but black has a tendency to fade.They used to look great—sharp and dark—until I cleaned them a few times, at which point the dye would start to fade again. Up until I discovered THIS stuff! I'd argue that the RIT dye colorstay fixative helps to at least double the dye's shelf life. Just follow the directions, then take pleasure in the outcomes! Another thing I discovered was that when I dried newly dyed clothes, a grayish stain would be left on the inside of the dryer, but that no longer occurs now that I use Colorstay!Although this product has received some unfavorable reviews, I bet it will function just as effectively for you if you follow the instructions.
3.8/5
If dyeing fabric with 35% or more polyester, acrylic or acetate, use Rit DyeMore Synthetic Fiber Dye instead
Made in USA
Get creative and create something unique with an easy dye technique, like an ice dye, dip dyed, marbled, shibori or tie-dye pattern
With 500+ color recipes available on Rit’s website, it is almost certain you’ll find the right color for your needs
Perfect for rejuvenating faded clothing, changing the color of apparel, shoes or accessories, coordinating home décor, hiding laundry accidents and so much more
100% Polyester
Deliver vibrant color to almost any type of fabric or fabric blend, including cotton, linen, silk, wool, rayon, ramie or nylon. This dye can even color wood, wicker, paper and cork
$234


Rit Dye Cherry Red was purchased for what I would consider an unusual purpose. I have been placing online orders for canvas shoes from Haband. White was the only color accessible at this time of year. It's difficult to get this size in my size, 10, Trip E. To test how well it worked, I ordered white sneakers and colored them red. Fine. Although the bottle's instructions are for fabric dyeing, using a paintbrush as an experimenting tool worked just well. I currently own a pair of red shoes. My advice is to leave the rubber side of the sole alone and not try to colour it. Use the color with extreme caution. This dye will discolor anything it "gets on," as the label forewarns. So that the dye would not get on my arms, I was wearing a leather welding outfit. CERTAINLY WEAR LATEX OR RUBBER EXAM GLOVES. To individuals who have experience working with semi-hazardous substances, I would suggest this product.


3.7/5
If dyeing fabric with less than 35% synthetic fabric (i.e. polyester, acrylic or acetate), use Rit All-Purpose Dye instead
With 250+ color recipes available on Rit’s website, it is almost certain you’ll find the right color for your needs
Dye synthetic fabric and fabric blends, which include anything with 35% or more polyester, acrylic, acetate or nylon. Perfect for rejuvenating faded clothing, upcycling, hiding laundry accidents and so much more
Get creative and create something unique with an easy dye technique, like an ombré, dip dyed, shibori or tie-dye pattern
Due to the complexity of dyeing synthetic fabrics, you must use this dye in a stainless steel pot on your stove top to maintain a high water temperature throughout the duration of dyeing. Cannot be used in a washing machine
$234
I once saw a fabric with pale yellow tips and hot pink points. It completely captivated me, and I yearned for it fervently! However, reports showed that the camera quality was subpar and that the yellow was actually white. In light of this, I bought 'Candy Shaggy' fur in white and pink with the intention of dying it. It turned out incredibly well! I describe what I did below in case you want to follow my example:I had a sizable pot that I use for hobbies like dying fabric. As I would be too cautious to cook food in a container that had had intense color in it, I would advise visiting Good Will or buying a designated "craft pot." I added salt, a small amount of soap, and just enough water to allow the small test pieces to float freely. I used both the soap, as advised by RIT, and the salt, as suggested by someone who had recently passed away.Once the water had reached about 200 degrees, I added a small amount of RIT Dye More Synthetic. I didn't do much because I wanted it pale. You would need to apply a lot more than I did if you wanted a vivid hue, in my opinion. However, avoid boiling the fur! I've heard that fibers can shrink and twist in really hot temps! Even if I didn't experience this, it's essential to keep an eye on things.I washed each cloth scrap in warm, soapy water. Before I placed it in the pot, I washed it quite well to make sure nothing was on the fibers. I stirred it frequently with metal tongs that I sacrificed to create a place where they couldn't be used for food again while I let it soak for about 10 minutes. RIT advises letting it soak for at least 30 to 60 minutes, but I only did it for ten because I wanted a pale appearance.Once I had the desired color, I removed it, cleaned it in warm water with additional soap, and then progressively cooled the water until it was icy and the water ran clear and soap-free. The cloth was then quickly dried using a hair dryer set to high heat while I fluffed it up with a brush and gave it periodic shakes to separate the fine fibers. If I dye a complete yard at once, I assume I'd want to put it in the dryer and watch it carefully.TIP: At first glance, the color appears much darker. When I took my cloth out of the pot, it was bright sunflower yellow and pink in color. It significantly brightened after drying, as can be seen in the pictures.Results exceeded my expectations. I was expecting the pink to become orange, but there is only the slightest hint of orange; it still appears brilliant. As long as you treat it gently and take your time during the process, RIT can assist you if you require bespoke fur colors to support a particular project. Although I haven't tried to achieve genuine BRIGHT hues, pale tones can be applied with ease.
3.6/5
Perfect for rejuvenating faded clothing, changing the color of apparel, shoes or accessories, coordinating home décor, hiding laundry accidents and so much more
Get creative and create something unique with an easy dye technique, like an ice dye, dip dyed, marbled, shibori or tie-dye pattern
With 500+ color recipes available on Rit’s website, it is almost certain you’ll find the right color for your needs
Deliver vibrant color to almost any type of fabric or fabric blend, including cotton, linen, silk, wool, rayon, ramie or nylon. This dye can even color wood, wicker, paper and cork
If dyeing fabric with 35% or more polyester, acrylic or acetate, use Rit DyeMore Synthetic Fiber Dye instead
$234


I really enjoy using RIT dye for so many different projects.Thought I'd add one more. So I do all of my dying in a modest lidded storage container that I have. To aid the fabric in better absorbing and holding the dye, I occasionally add vinegar or salt. However, I remove those items and add more after letting a few dyed items lie for a few hours or days.Here's what happens: Depending on what I was putting in there, my first batch will be black or very near to it.The remaining dye water is then applied to additional materials, which turn primarily gray after being allowed to set for a further number of days.Finally, I continue to keep the dye bath and add more items; the results are brown colors.I occasionally use the same dye solution for over 2 weeks while letting garments sit in order to acquire a variety of colours with just one packet of black dye.——I also use other dye colors in a similar way, turning them purple over time after the first batch turns out pink. After the first batch or two, green dye produces blues, occasionally a teal or turquoise!Therefore, don't just throw it out; continue using it for various colours to obtain the most value for your money.Last but not least, I no longer wash clothes in my washing machine since I want a more saturated dye bath. It still works great.


3.6/5
Dyes are safe to machine wash - colors stay bright and bold through repeated washings
Includes step-by-step technique guide featuring over 8 tie-dye looks to choose from
Best-selling tie-dye colors in one jumbo-sized kit
Features 6 extra large 16-oz. bottles of highly-concentrated nontoxic One-Step Dyes. Just add water to activate
Kit includes enough dye to create up to 72 projects
$234
I used this kit to tie-dye shirts for the field day of my preschool class. The shirts turned out fantastic! Each shirt I made using the spiral pattern turned out bright and with a distinct spiral pattern when I followed the instructions! The children were overjoyed!The color came out bright and lasts, there was no need for pre-soaking, and we got plenty of compliments on our shirts.Cons: Made fewer t-shirts than anticipated. Messy and a little challenging to use.My findings and completed tops are as follows: -This kit claims to produce up to 72 projects, however it only produced 18 youth small t-shirts, 3 adult small t-shirts, and 1 adult xl t-shirt, with possibly another 2-3 shirts' worth of dye. So I would purchase 1 kit for each class of 18–20 students.It remains disorganized. I made my own, better-fitting latex-free gloves and used a roasting pan for a bird. I also wore an apron and covered the table with plastic.-It rapidly became too messy for the kids to be handling the dyes, so I was forced to apply the dye. And to sufficiently saturate the fabric with dye, you really need to dig into the creases of the shirts.Getting the fabric just a little bit damp makes it much easier to apply the dye. If it's too wet, the color fades. The dye rolls off dry fabric because it repels it.
3.4/5
Many Uses: For 100 years, customers have relied on Rit to rejuvenate old garments, change the color of their clothing and accessories, coordinate home decor, hide laundry accidents and more
Ignite Your Creative Spirit: Create something custom and unique with an ombre, dip dyed, shibori or tie dye pattern
How to Dye: Use Rit with a washing machine, plastic bucket, stainless steel sink or pot
What Will Rit Dye: Cotton, linen, silk, wool, ramie, rayon, nylon, wood, paper, cork, some plastic and fabric blends that do not contain more than 35% polyester. Does not dye 100% polyester, acetate or acrylic. Instead, use Rit DyeMore for Synthetic Fibers
Custom Colors: Mix dyes to create more than 500 additional colors. Color recipes avaialble on the Rit website
$234


Okay, so this dye brand is quite good. I have a pair of black jeans that the fabric softener in the washer ruined (the softener had settled into the wrinkles in the fabric)I looked online for solutions to the problem and found this product.My jeans were pre-soaked in cold water.Then, I put 1.5 gallons of distilled water, 1/2 cup of Rit Dye, and 1 cup of salt in a bucket. I dove my pre-soaked jeans into the concoction after that. I let the jeans sit for an hour, stirring them every ten minutes (for even coverage) The secret to equal coverage is pre-soaking.After soaking them, I rinsed off all the dye and put the clothes in the washing machine on cold with laundry detergent. Jeans turned out fantastic! The stains had practically disappeared. I repeated the dyeing procedure after a few days had passed. It even performed better! My jeans no longer have any stains and appear to be the true black they ever were.WEAR GLOVES AT ALL TIMES WHEN DYEING OR YOU WILL GET BLACK HANDSThe two dye sessions were worth the effort; the jeans were $80 and the repairs cost me a total of $10.
There are two types of garment dyes: acid and basic. Acid dyes are used on natural fibers such as wool, silk, and nylon. Basic dyes are used on synthetic fibers such as polyester and acrylic.
You can dye fabric wet or dry, but it is generally easier to dye fabric when it is wet. Wet fabric is easier to work with and will result in more even color.
Basic dyes are water-soluble dyes that are applied to textile fibers in an acidic environment. The term "basic" refers to the fact that these dyes are basic compounds, which means they contain a metal ion that can be positively charged. Basic dyes are typically used to dye nylon, wool, and silk.
Dyes are classified according to their solubility in water. There are three categories of dyes: acid dyes, basic dyes, and direct or substantive dyes. Acid dyes are water-soluble and are used on wool, silk, and nylon. Basic dyes are water-insoluble and are used on cellulose fibers such as cotton and linen. Direct or substantive dyes are used on both protein and cellulose fibers.
There are four main types of textile dyeing: direct, vat, acid and reactive. Direct dyeing is the simplest and most commonly used method, where the dye is applied directly to the fabric. Vat dyeing is a more complex process where the fabric is first soaked in a dye bath, then removed and allowed to oxidize. Acid dyeing is used for wool and nylon, and involves soaking the fabric in an acidic solution. Reactive dyeing is the most permanent method, where the dye chemically bonds to the fabric.
Different types of fabric dye include natural dyes, acid dyes, basic dyes, direct dyes, and fiber-reactive dyes. Natural dyes are made from plant or animal sources, while acid dyes are used on protein fibers like wool or silk. Basic dyes are used on cellulose fibers like cotton or linen. Direct dyes are used on both cellulose and protein fibers. Fiber-reactive dyes are used on cellulose fibers and become permanently bonded to the fabric.
COPYRIGHT © 2019


